Before You Begin
With the iOS 9 update came a variety of security updates. One of which was the inability to print via WebPrint on an http connection. STAR has updated their firmware to support https:// but this now requires a few things to be done in order for you to print to your WebPrint printer from an iOS device again. The following must be done from a standard Windows PC.
3 Steps are involved to ensure your iPad will print using the HTTPS standard or SSL/TLS protocol.
Step 1: Firmware Upgrade
Do you need to update your printers firmware? If you are not sure what version of firmware your printer currently has, please do the following to find out:- Turn your printer off
- Hold down the FEED button while off
- While holding FEED, turn the printer back on
- Continue holding the feed button until the printer begins printing
- Wait for 2 pages to print - We will use both pages during this article.
- Your second page should include the firmware version.
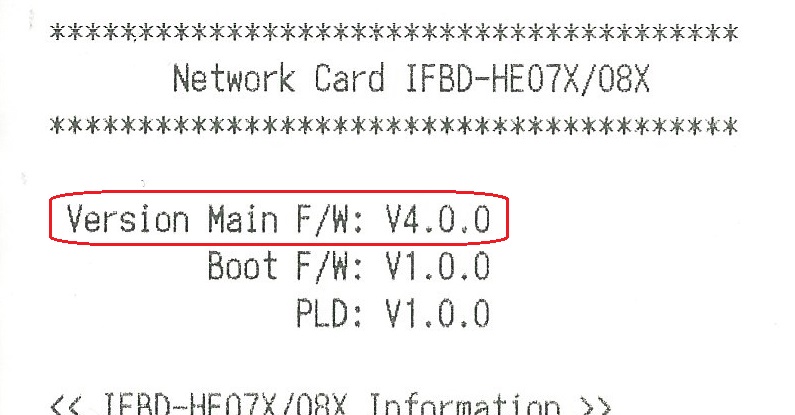
This is indicated as " Version Main F/W: Vx.x.x "
- If you are on v4.0.0 then you can skip the firmware update taking you to step 2 below.
- If you are on a version of 3.x.x or prior you will need to update your firmware. Please download the latest firmware from the link below on a PC:
Firmware Download
- Once you have downloaded this file to your PC, right-click on the file and extract all files
- Use the Default folder path which should create a new folder called v4.0.0 in the downloaded folder.
- Copy the extract files by right-clicking on the folder and selecting COPY <you will not see anything occur>
- Go to your C:\ Drive and create a new folder and label it FW
- Copy the files extracted in the previous step to this FW folder - you should see windows copy the files to this folder
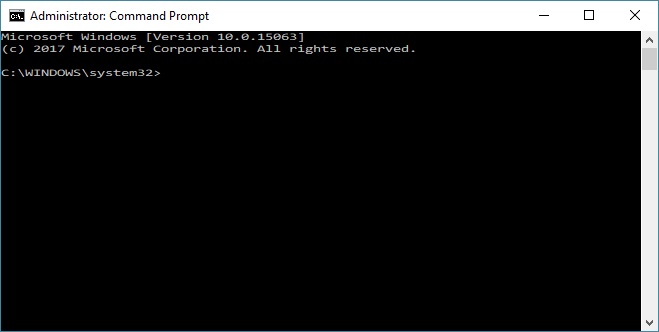
- Now from your PC, go to the administrative command window. Start | Accessories | Right-Click on Command Window and choose Run as Admin
- This should open the following window:
- Please type CD C:\FW
- This should take you to the FW folder created on your C:\ Drive in the previous step

- Type FTP followed by a space and the IP Address of your printer. You should be asked to login. Use the following user name: root

- Typing the password will not show you as you are typing but please type the following in lowercase to login: public

- If the user name and password input was successful, type in "cd firmware" and press Enter to change to the firmware directory. To make sure we are in the correct area, type in "pwd" and then press enter. You should be presented with this message:

- Then, type in "bin" and press Enter. You will get the message below:

- Now, type "put HE7_V400(NIC_MAIN).bin" and then press enter.
 **WARNING: If you get an error saying that Active Mode/Extended Active Mode is not supported, do not continue. Contact us immediately and we will let you know how to proceed.**
 - After seeing the transfer complete message below, print out another set of self-test pages to confirm that the new firmware version is on 4.0. You should see the same printout as indicated above in step 6.
 *We have now upgraded your printer's firmware!
Before You Begin
With the iOS 9 update came a variety of security updates. One of which was the inability to print via WebPrint on an http connection. STAR has updated their firmware to support https:// but this now requires a few things to be done in order for you to print to your WebPrint printer from an iOS device again. The following must be done from a standard Windows PC.
3 Steps are involved to ensure your iPad will print using the HTTPS standard or SSL/TLS protocol.
Step 1: Firmware Upgrade
Do you need to update your printers firmware? If you are not sure what version of firmware your printer currently has, please do the following to find out:
- Turn your printer off
- Hold down the FEED button while off
- While holding FEED, turn the printer back on
- Continue holding the feed button until the printer begins printing
- Wait for 2 pages to print - We will use both pages during this article.
- Your second page should include the firmware version.
This is indicated as " Version Main F/W: Vx.x.x " - If you are on v4.0.0 then you can skip the firmware update taking you to step 2 below.
- If you are on a version of 3.x.x or prior you will need to update your firmware. Please download the latest firmware from the link below on a PC:
Firmware Download - Once you have downloaded this file to your PC, right-click on the file and extract all files
- Use the Default folder path which should create a new folder called v4.0.0 in the downloaded folder.
- Copy the extract files by right-clicking on the folder and selecting COPY <you will not see anything occur>
- Go to your C:\ Drive and create a new folder and label it FW
- Copy the files extracted in the previous step to this FW folder - you should see windows copy the files to this folder
- Now from your PC, go to the administrative command window. Start | Accessories | Right-Click on Command Window and choose Run as Admin
- This should open the following window:
- Please type CD C:\FW
- This should take you to the FW folder created on your C:\ Drive in the previous step
- Type FTP followed by a space and the IP Address of your printer. You should be asked to login. Use the following user name: root
- Typing the password will not show you as you are typing but please type the following in lowercase to login: public
- If the user name and password input was successful, type in "cd firmware" and press Enter to change to the firmware directory. To make sure we are in the correct area, type in "pwd" and then press enter. You should be presented with this message:
- Then, type in "bin" and press Enter. You will get the message below:
- Now, type "put HE7_V400(NIC_MAIN).bin" and then press enter.**WARNING: If you get an error saying that Active Mode/Extended Active Mode is not supported, do not continue. Contact us immediately and we will let you know how to proceed.**
- After seeing the transfer complete message below, print out another set of self-test pages to confirm that the new firmware version is on 4.0. You should see the same printout as indicated above in step 6.*We have now upgraded your printer's firmware!
Step 2: Creating a Self-Signed Certificate
Now that your firmware is updated, we can create a self-signed certificate and install this to your iPad for printing to an HTTPS address.
- Go to your iPad and open up Safari
- Type the IP Address of your printer at the address bar

- Select Login from the left or System Status at the top, then Login.

- Use the following User Name: root and the following password: public

- Once you have logged in, select SSL/TLS on the left or Network Configuration and then SSL/TLS at the top

- Please ensure your SSL/TLS settings are set to Enabled using port 43 and using a self-signed certificate

- Select Submit

- Select SSL/TLS on the left or Network Configuration SSL/TLS from the top.

- Now select the option Create Self-Signed Certificate

- Enter in the available fields with your local information. Domain should match the IP Address of the printer.

- Select Create to create your Self-Signed Certificate

- Select the option Previous Page - the Certificate Form will appear blank. Select Download

- This should redirect you to your iPad's Install Profile option. Please select Install in the upper right

- Once you have installed the profile you can test your application. First, log into your instance and go to Store Operations. Then Settings, then the Register Settings.

- Select the option to update the register you will be using your iPad with.

- Make sure you are set to use the IP Printer, and that the IP matches your printers IP.

- Select TEST to the right of the IP Address
- If the test is successful, you should get the following green check mark:

- If you get the green check as indicated above, you should be able to save and begin printing to this printer from within MicroBiz.
Be sure to save your settings!!!
**If you get the red X as indicated below, then there is an issue with the certificate or the profile did not get created properly on your iPad: